
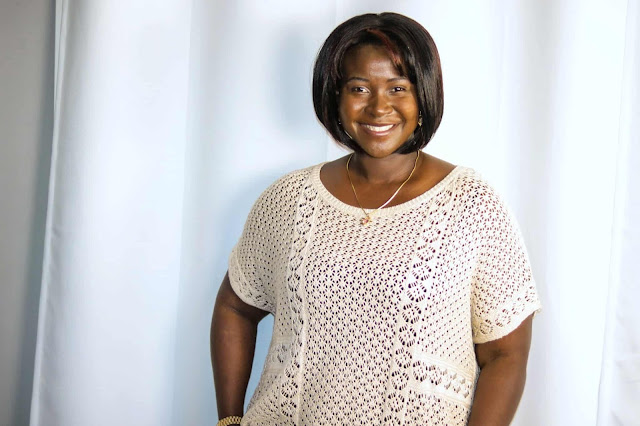
I love smiling, and you know what they say "smile is the prettiest thing you can wear". Smile is powerful, contagious and instantly improves moods. Likewise, smiling makes a great first impression.


It goes without saying having a strong and natural smile is attributed to having a healthy and well kept teeth. It gives the boost of confidence needed to give a winning smile. That is why my dental hygiene is very important to me.


I maintain a good oral health by visiting my dentist regularly, but I've always wanted to try at home teeth whitening to help remove stains and brighten up my smile.
Over the years I have tried my share of white strips from the drugstores with little or no results. So when Smile Brilliant contacted me to try their custom at home teeth whitening kit, I figure I'll give it a try and see if it actually works.
For the past few weeks, I have been using Smile Brilliant's At Home Teeth Whitening Kit to help get my smile lasting and brighter. So today, I'm sharing my experience and results with you!
For the past few weeks, I have been using Smile Brilliant's At Home Teeth Whitening Kit to help get my smile lasting and brighter. So today, I'm sharing my experience and results with you!
AT HOME TEETH WHITENING KIT: WHAT'S INCLUDED?
Smile Brilliant sent me teeth whitening kit that included all the essentials needed to get the job done. I was sent impression trays (top and bottom), catalyst pastes, base pastes, syringes, whitening gels, desensitizing gels along with instructions guides that vividly demonstrated how to start the teeth whitening process.

As mentioned the instructions are very self explanatory, but I made a mistake when I took so long taking pictures. The mixture dried up on me, so my advice to mix catalyst and base as fast as possible. Don't worry about taking pictures so the putty doesn't get dry up on you. Fortunately, Smile Brilliant sent extra catalyst and base pastes so I was able to redo that step.


GETTING TEETH IMPRESSIONS:
The first step was to complete your consent card, then mix the catalyst and base paste to the right consistency. Once the putty is at a great consistency, I was instructed to put it in the tray, bit and grip for just a little while. Then take it out, verify, and repeat to get the upper/bottom impression done as well.


Once both were done, was instructed to let it dry for about 30 minutes, rinse it off, without removing the final impressions from the tray. I then let it dry over night and shipped it off to get my custom impressions done and returned to me in a little over a week.


AT HOME TEETH WHITENING: DOES IT WORK?
I received my custom teeth impressions in a little over a week and I begun the whitening process soon after. I like that the impressions were fitted to my teeth and I was able to whiten my teeth at my convenience.


The whitening process was easy; all I had to do was to put a thin layer of gel on my tray, stick it in your mouth and leave it in for between 45 to 3 hours depending on sensitivity level. I generally whitened for 45 minutes and I didn't whiten my teeth every day. I whitened every other day depending on my schedule.


After 45 minutes, I'd take the trays out, brush my teeth with just my tooth brush, rinse out the tray and start the desensitizing process for another 20 minutes.


FINAL THOUGHTS: TEETH WHITENING REVIEW
The whitening process was sensitive for me at first, but after some tips from a representative, the sensitivity level reduced significantly and I was able to get it all done as needed. I saw results almost immediately, I was very impressed. It took me about 3 weeks to finish whitening my teeth.

My only critique is, the process takes time, over an hour for me to do both the whitening and desensitizing.
As a mother of 4, there's no way I could have done this with my children around and wanting to talk. So I made sure to start the process after I have put them to bed. So be sure to allocate at least 1 hour and 30 minutes to get both done.Time moved quite slow if I just sat during whitening, so I multitasked by either working on my blog or reading a book.


To be honest, I was sceptical at first,but I'm glad gave it a try. I'll definitely try it again in the future if I ever need a little confidence with regards to my smile. Smile Brilliant definitely gave me a better result than the white strips I tried over the years. I was able to get a professional teeth whitening results without the hefty price tag and that's a win for me.

GIVEAWAY FOR ONE LUCKY WINNER:
I've partnered with Smile Brilliant to give one lucky winner a custom whitening kit of their very own! Enter Here and be sure to share it with your friends and family so they can also enter for a chance to win!
Do you want your Smile Brilliant tooth whitening kit now? Use code diaryofayummymommy15 to get 15% off your purchase store wide! Good luck and let me know all about your whitening experience!

Do you want your Smile Brilliant tooth whitening kit now? Use code diaryofayummymommy15 to get 15% off your purchase store wide! Good luck and let me know all about your whitening experience!

Medaase (Thank You) and until next time, #SMILEFEARLESSLY!
xx
EMELIA


